TaskEngine / From the site to the client
Site updates & clients
Turn field information into a clear project view, with photos, shared documents and conversations tied to the work.
TaskEngine is the software; WCTK is the customer shown in these demo captures. Screenshots show different phases and dates, not a single live session. This guide does not publish material or send messages.
Office / Project workspace
Start with the right task
Open project 1118 and select Site Updates. Choose the relevant task from the project plan list on the left. Review its incoming reports before preparing the client-facing update.
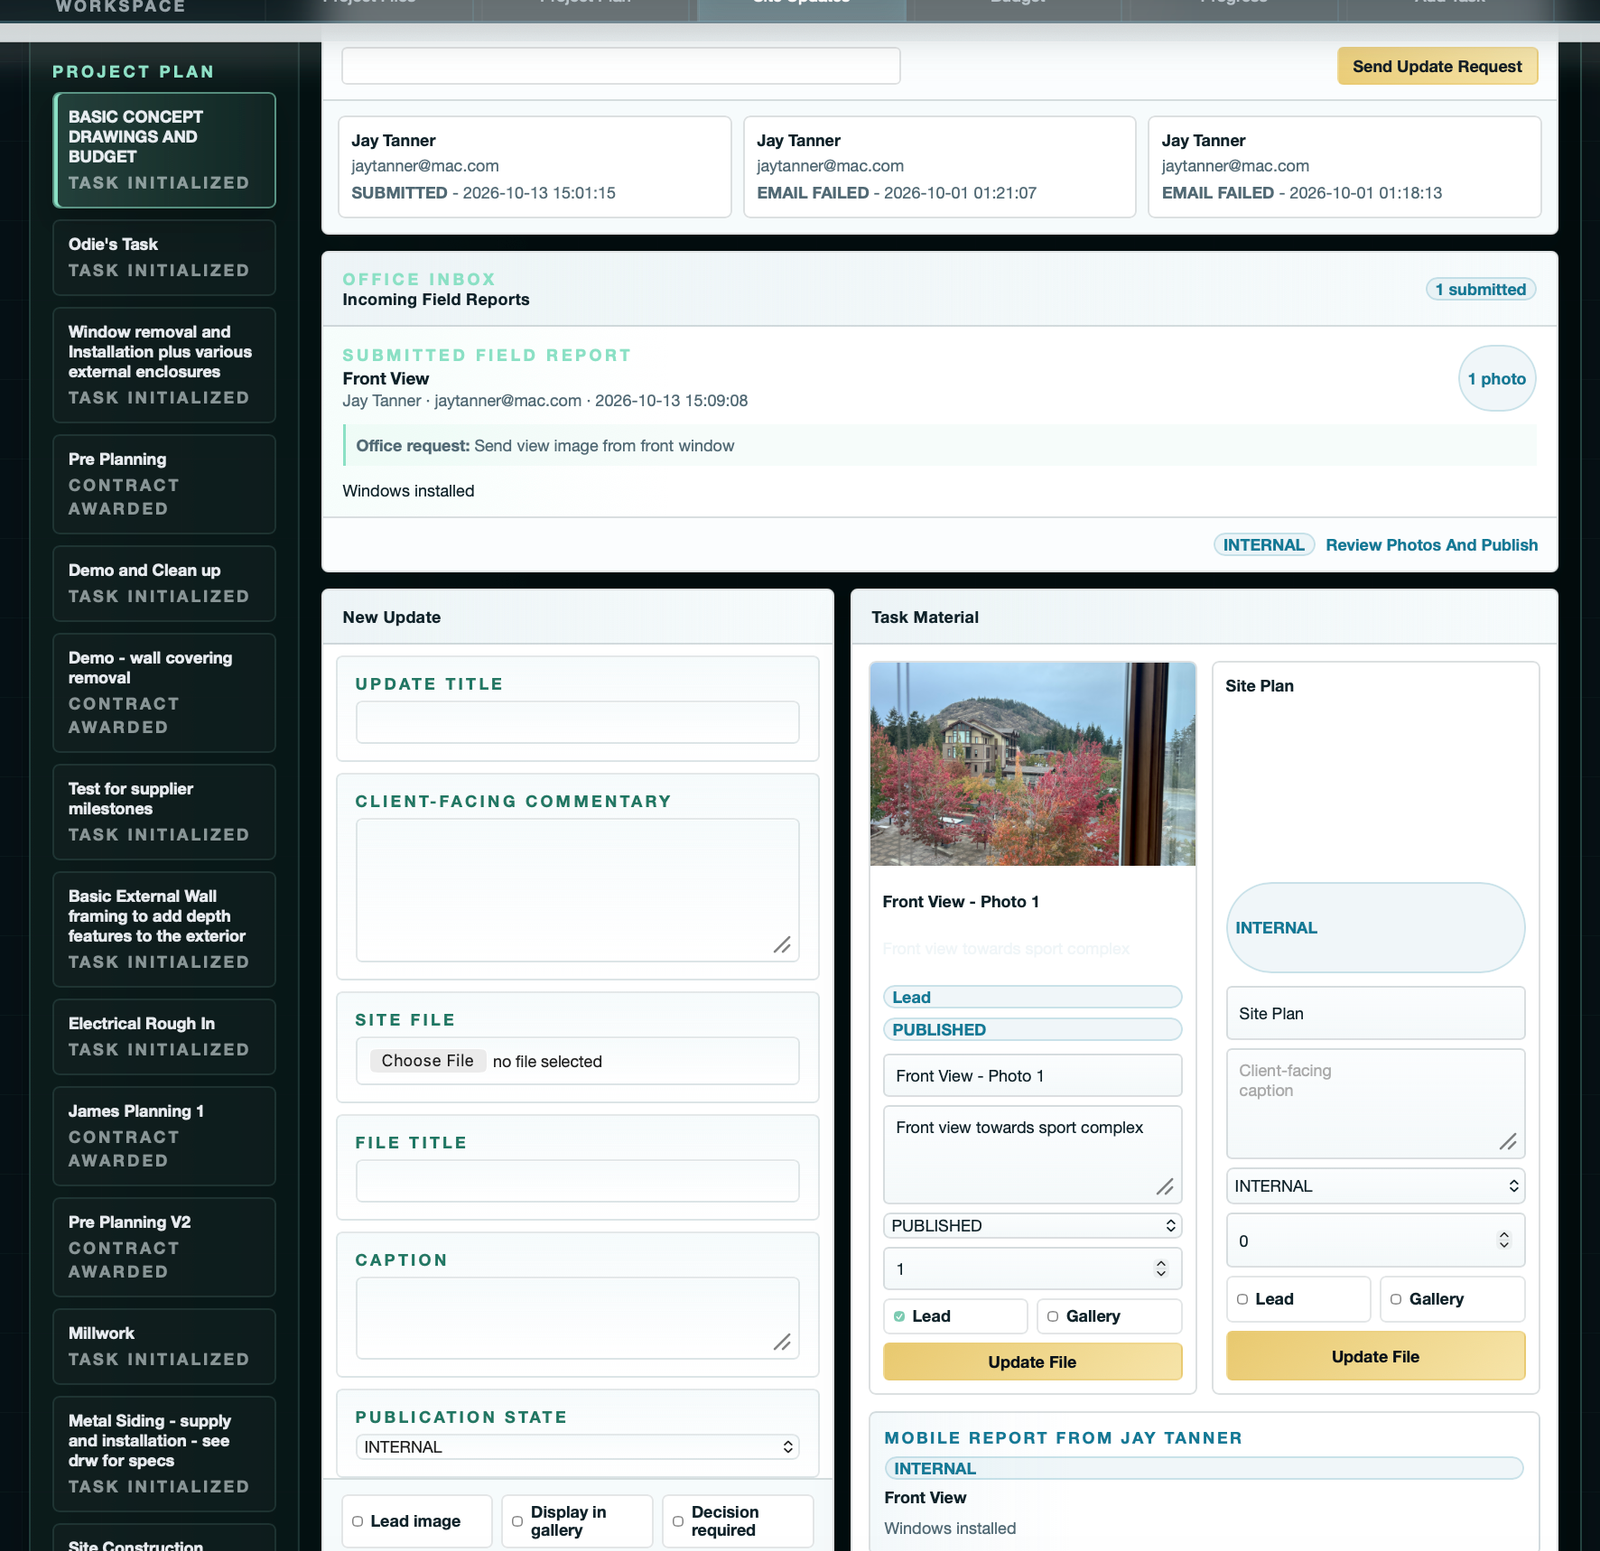
- Request an updateUse the update-request section for the selected task. Give the recipient a specific instruction, such as which view or installation to photograph.
- Review the reportCheck the reporter, submission time, office instructions, commentary and photo count in Incoming Field Reports.
- Review the materialSelect Review Photos And Publish to reach Task Material. Check each image and its caption before making it client-visible.
A request marked Submitted is different from a report's publication state. Likewise, an Email Failed result needs attention even if the request record exists.
Office / Content review
Make the update useful and deliberate
For a new office update, enter an Update Title and Client-Facing Commentary. Add a site file when needed, with a meaningful file title and caption. Set the publication state and save the update. For an existing file, adjust its fields in Task Material and select Update File.
Explain what changed
Describe the work completed, what the photograph shows and any next step the client needs to understand. Check that the text refers to the selected phase.
Choose the image role
Lead identifies the main image. Gallery selects gallery display. Use the display order to arrange files; neither checkbox replaces the publication-state check.
- Internal
- Keep unfinished site material out of the client-facing selection. Review both the update and its attached files.
- Client Ready
- Visible in the current client portal. This is not a private staging state.
- Published
- Visible in the client portal and counted by the launcher's published-content indicators.
- Archived
- Excluded by the current portal's site-material visibility filter. Check any related files independently.
Check linked material: the portal can display an update's text when an attached site file is Client Ready or Published, even if the update itself is Internal. Review the commentary and file together before exposing either to the client.
Separate document rule: supported active Project Documents and Task Documents appear in the client library without a separate site-update publishing step. Inactive library files are excluded. Keep internal-only documents out of active client-visible libraries.
Office / Clients
Preview before sharing
Open Clients and locate the correct project and client. Use Preview Portal to inspect the client experience. Use Manage Content when the material needs attention. Before sending access, choose and verify the intended recipient.
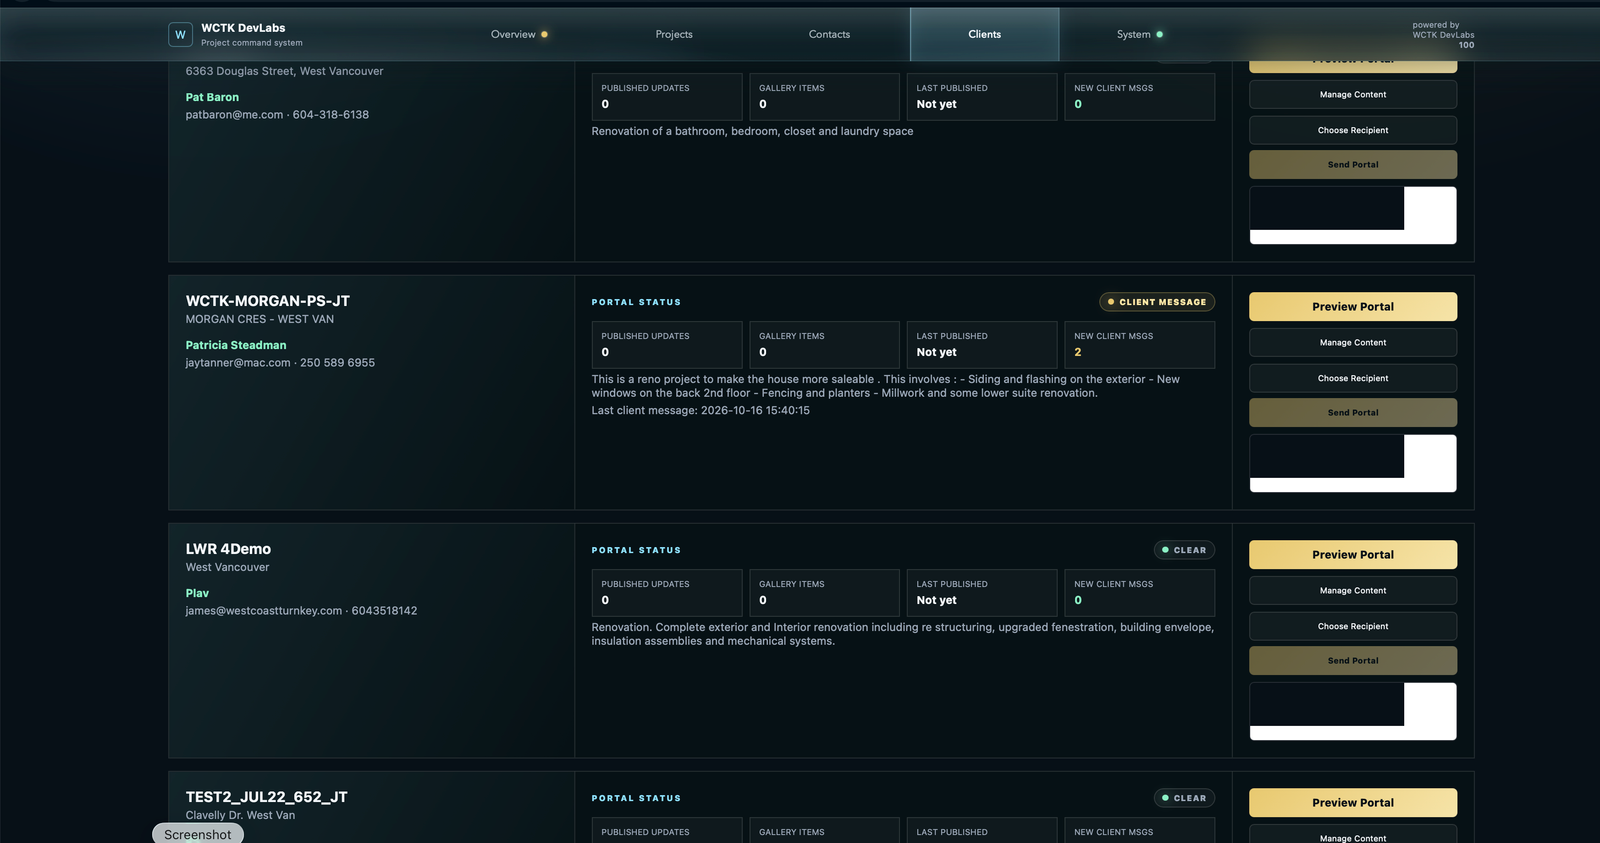
- PreviewCheck the phase updates, document library and messages in the portal. Confirm that the intended information is visible.
- Choose RecipientVerify the client's email and project before enabling the send action. Do not assume the displayed contact is the intended recipient.
- Send PortalRead the returned result after sending. A preview is not evidence that the invitation was delivered.
Published Updates and Gallery Items are not a complete inventory of portal content. Client Ready site material and active library documents can be visible even when a published-content count is zero.
Client / Project progress portal
Explore the client's view
The portal brings the project identity, shared files, phase timeline and conversations into one place. These four views show the main client journey.
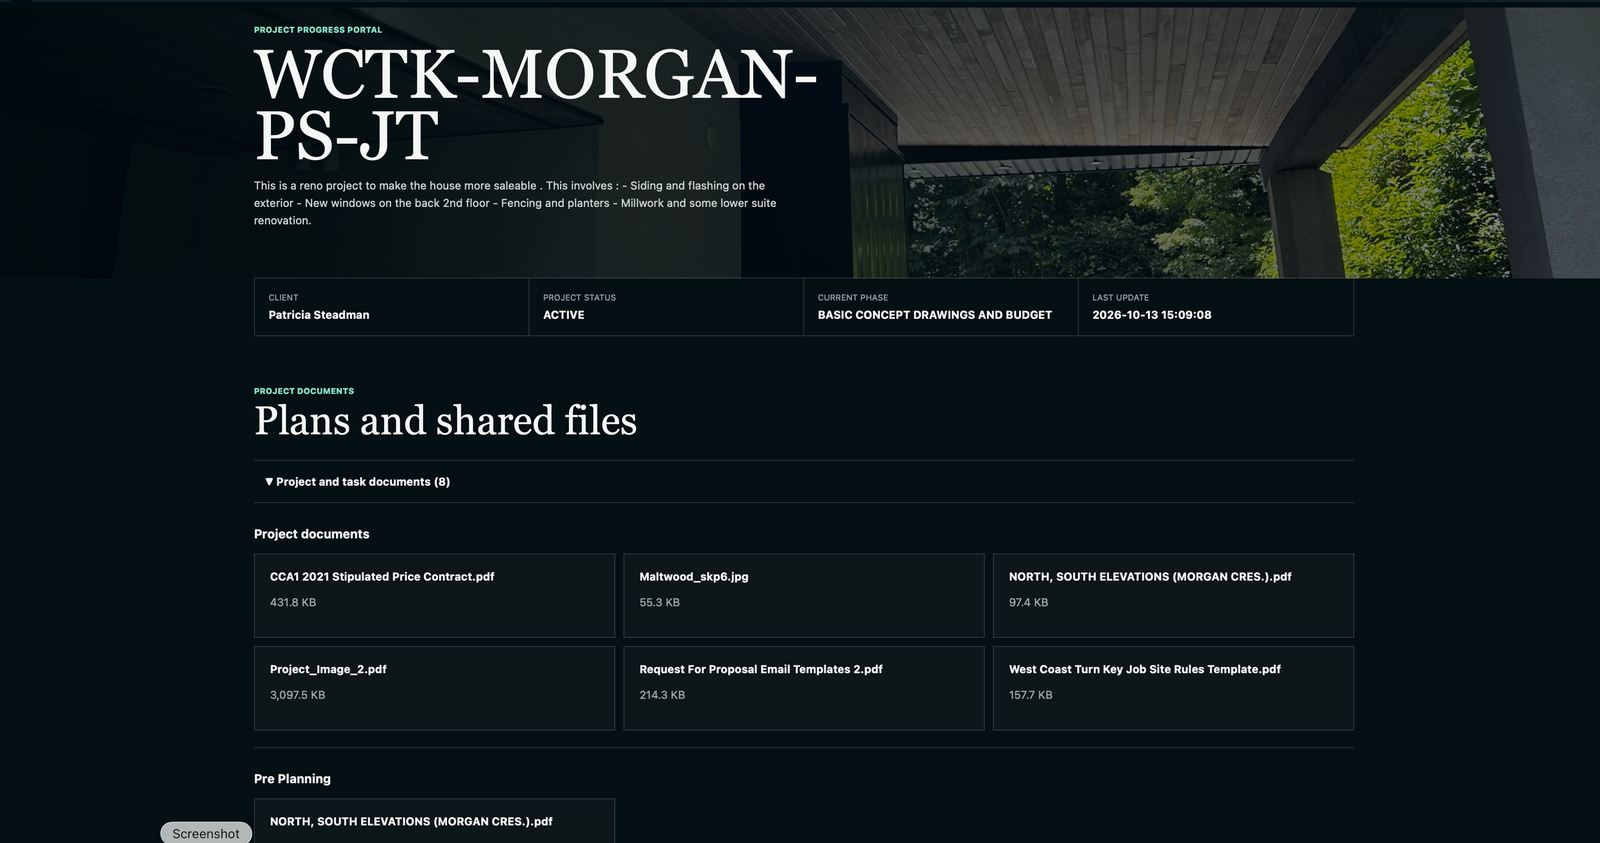
Expand the library
Select the Project and task documents row. The count reflects the files available in that view, not the number of site reports.
Find the right scope
Project documents appear together; task-specific documents are grouped under their task. Select a file to open it and confirm the drawing or revision you need.
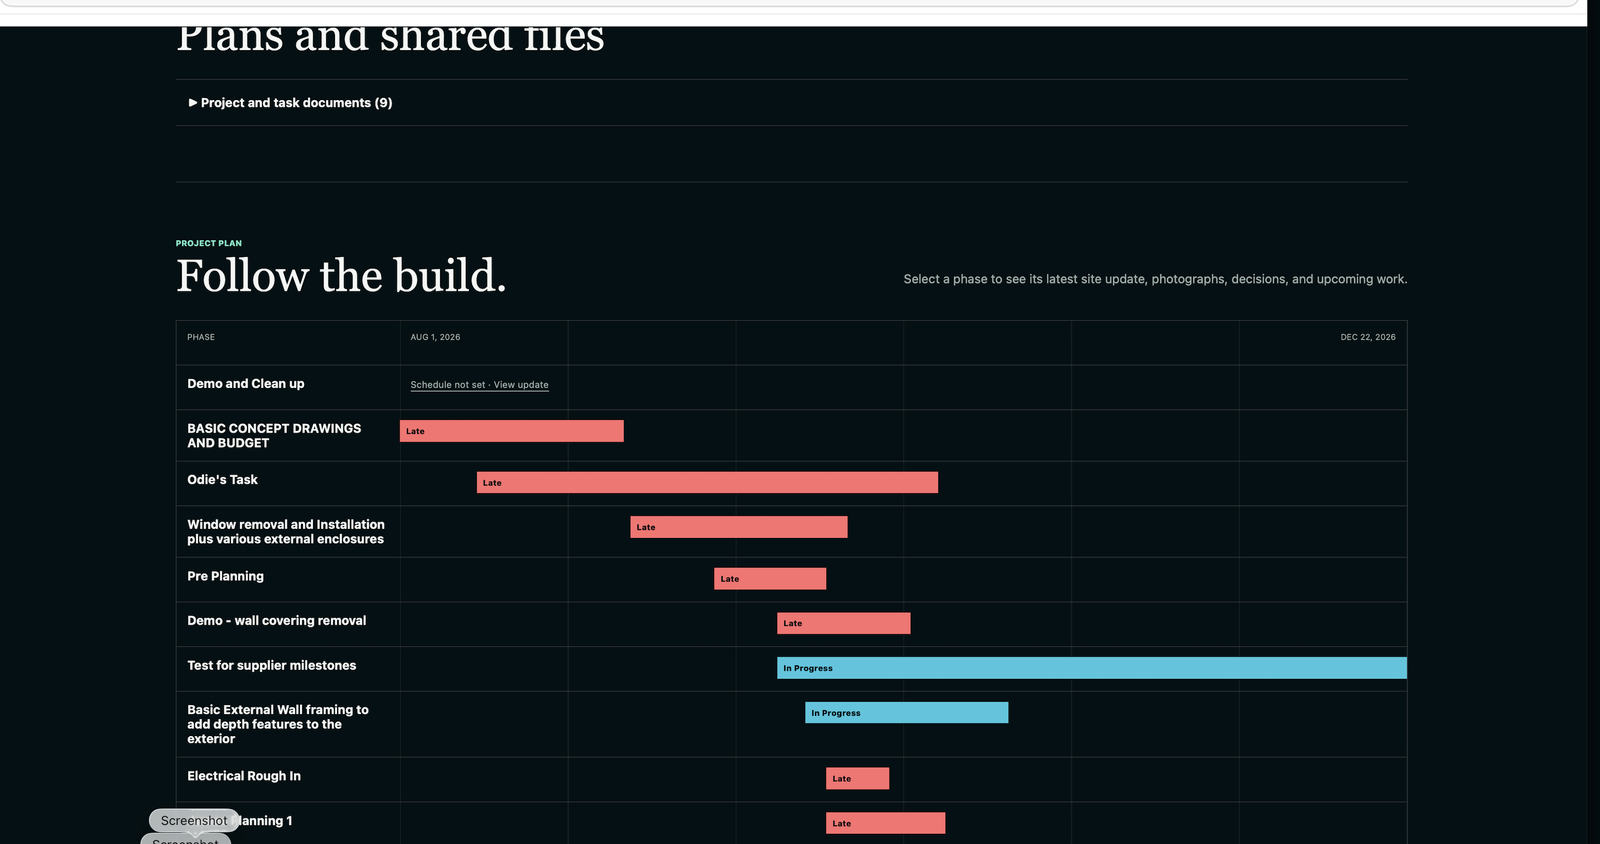
- Late
- Red bars draw attention to work marked late by progress status. Lateness does not change the task's commercial status.
- In Progress
- Read the label alongside the timeline. A scheduled span is not a direct measure of percent complete.
- Schedule not set
- A phase without usable schedule dates can still offer a View update link. No bar is preferable to inventing dates.
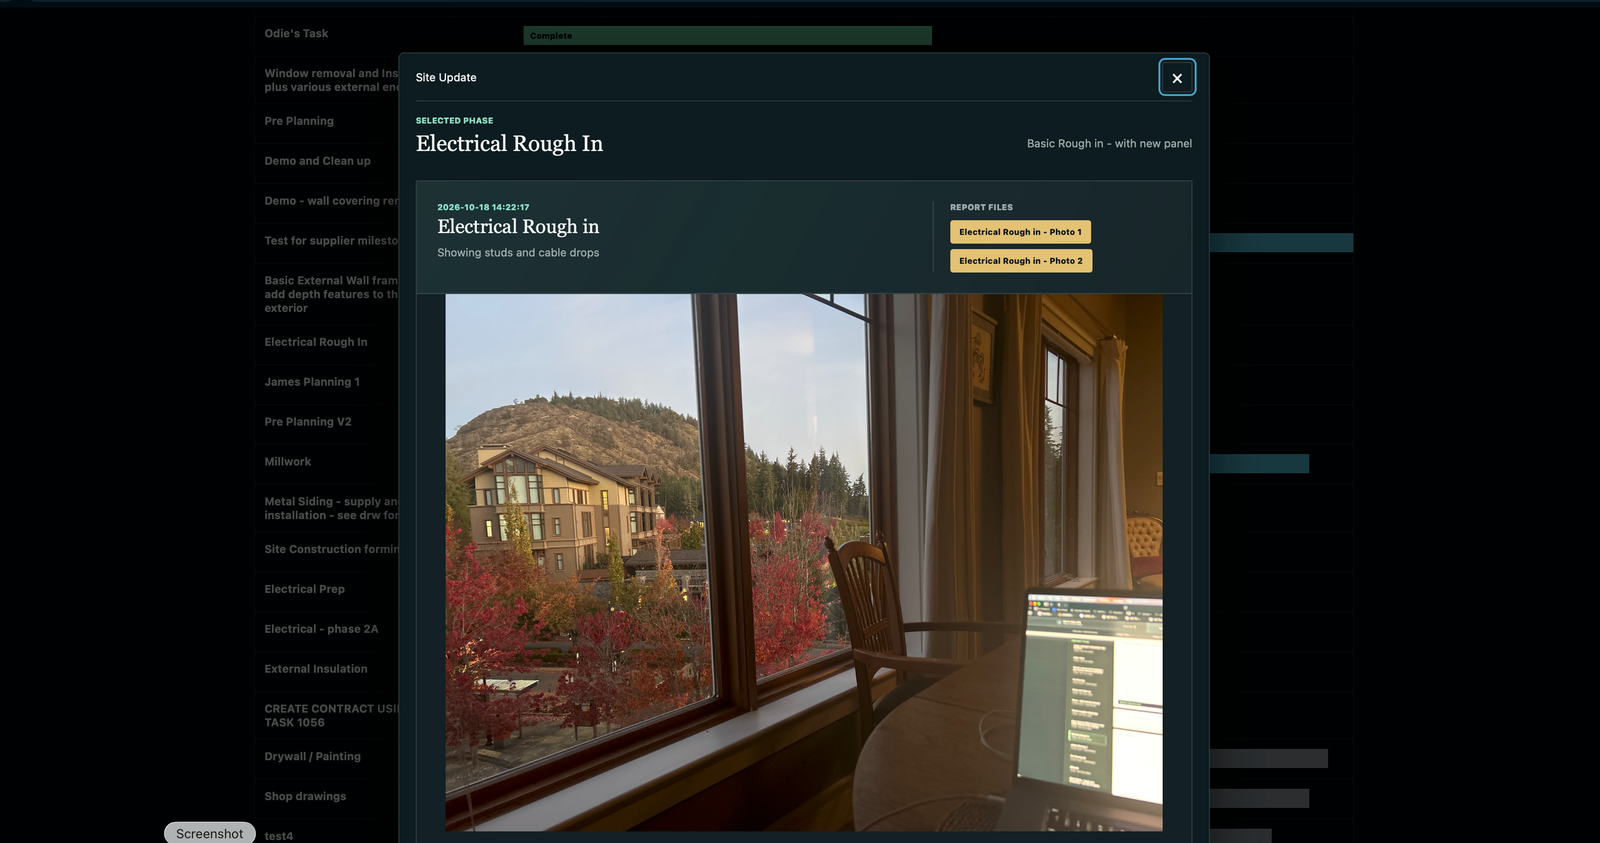
Read the update
Check the selected phase, report title, timestamp and commentary. The timestamp belongs to the displayed report, not necessarily every task in the project.
Open report files
Use the named Report Files links for supporting photos or documents. Close the update with the X to return to the timeline.
The photographs are demonstration content. A report and image provide context; they do not themselves certify completion or approve payment.
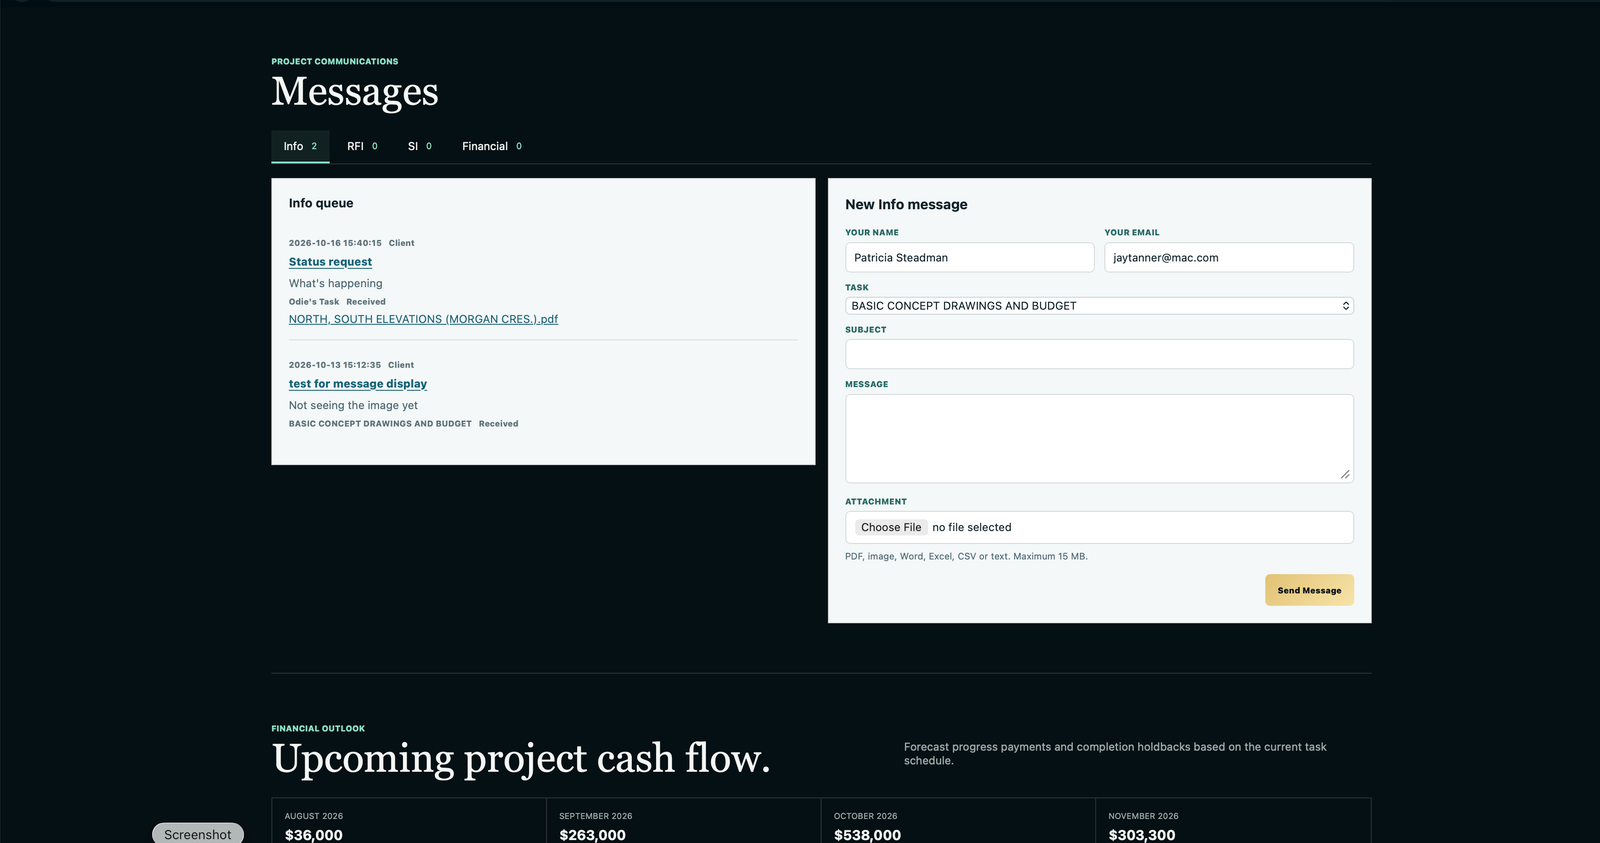
- Choose the categoryUse Info for general information, RFI for a clarification, SI for site instructions and Financial for financial correspondence.
- Keep the contextConfirm your name, email and selected task. Select an existing conversation when continuing a discussion, or start a new message with a clear subject.
- Attach and sendAdd supporting material if needed, select Send Message and check the result. Confirm the message and attachment appear in the appropriate conversation.
The form accepts PDF, images, Word, Excel, CSV or text files up to 15 MB. Financial is a correspondence category, not an invoice-approval or payment action.
Office / Keep the conversation moving
Respond to what needs attention
Return to Clients and check the project's New Client Msgs indicator. The yellow Client Message signal highlights client messages still recorded as Received; green Clear means none meet that condition. It is not proof that every issue has been resolved.
Review the message and attachment
Open the relevant conversation in your communication workflow, check its project and task, and read the supporting file before responding. Keep the reply tied to the discussion.
Check the client-facing result
After an office response, verify the intended reply is available in the client conversation. Do not assume every internal note or every saved reply sends an email notification.
Read the financial outlook and project progress separately
The lower portal includes the cash-flow outlook and overall project progress chart. Use them to compare planned timing, recorded work and billing. Forecast cash flow is not an invoice; schedule elapsed is not work complete; billed value is not proof of payment.
The overall progress chart is not pictured in this set of captures. Check it in Preview Portal after changing the underlying project or task data.
Before sending the portal
A quick review
- Project and phase
- Confirm the selected project and task before requesting, saving or reviewing a report.
- Site material
- Review the commentary and each attached file. Client Ready and Published material is client-visible.
- Library files
- Supported active project/task documents are client-visible without a publishing step.
- Recipient
- Check the intended email and read the Send Portal result.
- Messages
- Keep the category and task context clear. Check attachments and follow up on Received messages.
- Progress
- Distinguish the schedule, recorded work, forecasts, billing and actual payments.
Try it in the demo
Preview project 1118, expand its documents, open a phase update and review its report files. Inspect the message categories without sending a test message to a real client.
Back to the beginning ↑